


Digitize Hat Embroidery Designs for Structured and Unstructured Caps

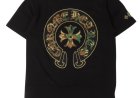
Hats are everywhereteam caps, dad hats, custom merch, promo giveawaysbut did you know that embroidery on hats is not the same as stitching on a t-shirt? The design might be the same, but the surface, shape, and fabric of hats make embroidery trickier. Thats why if youre planning to decorate caps, learning how todigitize hat embroidery designs properly is key to getting pro-quality results.
In this guide, well break down:
- The difference between structured and unstructured caps
- How to digitize designs specifically for hats
- What settings, stitches, and techniques to use
- And why starting with the right file matters more than you think
Need your logo or design professionally digitized for hats? Digitizing Buddy specializes in embroidery files optimized for headwear. Their experts make sure your design runs clean and smoothwhether youre stitching on trucker hats, beanies, or low-profile dad caps.
Lets dive in!
Structured vs. Unstructured Caps: Whats the Difference?
Before you digitize anything, you need to know what kind of hat youre working with. Why? Because it affects how the fabric behaves under the needle.
Structured Caps
These hats have a stiff front panel, usually reinforced with buckram (a kind of stiffening fabric). Think:
- Baseball caps
- Trucker hats
- Flat brims
Pros:
- Holds its shape
- Stable surface for embroidery
- Great for bold, high-profile logos
Unstructured Caps
These have soft front panels and no stiffener. Common types include:
- Dad hats
- Low-profile cotton caps
- Soft-fabric promotional hats
Pros:
- More comfortable
- Easier to wear casually
So, when digitizing for caps, you must tailor your design and stitch settings based on this difference.
How to Digitize Embroidery Designs for Hats
Digitizing for hats is not just resizing your normal logo and hitting "save as DST." It requires thoughtful planning. Heres how pros do it.
1. Start with a Hat-Friendly Design
Simple, bold designs are best for hats. Consider:
- Minimal small text
- Clean outlines
- Moderate stitch density
- Horizontal layouts (avoid tall or vertical designs)
Ideal size:
Most cap designs stay within 2.25" height x 4.5" width to fit the curve.
2. Use Center-Out Stitching
Hats are curved and hooped from front to back. If you stitch left-to-right like a flat surface, the hat may shift or warp.
Start in the center, then stitch outward to balance the tension.
3. Use Bottom-Up Sequencing
Start stitching from the bottom of the design to the top. This keeps fabric tight and prevents top elements from misaligning due to tension changes.
4. Watch Your Density
Caps cant handle super-heavy fill designs, especially unstructured ones.
Use satin stitches for clean lettering and borders
Keep fill stitch density lower to avoid pushing the fabric
Add underlay stitching to stabilize wide areas
5. Avoid Tiny Text
Tiny text is hard to read and even harder to stitch on hats. Keep text at least 56 mm tall for good results. If you need small details, use run stitches, not satin.
6. Underlay Is Your Friend
Underlay stitches help "tack down" the fabric before the top stitches are applied. For caps:
- Use a zigzag or edge walk underlay beneath satin
- Use a grid underlay beneath fills
- This keeps the hat from moving and keeps details crisp.
7. Account for Seam and Center Curve
Most caps have a seam in the center. Avoid putting important details or text right on the seam, as it can distort or break the design.
Design Tip: Split logos or use thinner stitching over the seam.
8. Add Cap Compensation
When digitizing, youll want to apply pull compensation to counteract distortion caused by the hats curve and movement.
Also, keep short stitch lengths to minimize thread pulling.
Stabilizing and Hooping Caps for Embroidery
Even the best digitized file will fail if the cap isnt hooped correctly. Here's what you need:
Use a Hat Hoop or Cap Frame
Regular hoops wont work. Use a machine-specific cap frame that holds the bill and stretches the front panel taut.
Use Cap-Backed Tear-Away Stabilizer
Tear-away works well with structured caps. Use heavyweight stabilizer to reduce shifting.
For unstructured caps, consider adding a cut-away or adhesive stabilizer for extra support.
Clamp and Smooth the Cap
Make sure the cap is centered, smooth, and tight in the frame. No wrinkles!
Common Hat Embroidery Mistakes
Avoid these when digitizing or stitching on caps:
- Too-dense designs causes puckering or broken needles
- No underlay stitching leads to movement and gaps
- Auto-digitized designs rarely account for cap shape
- Design too close to seams loses clarity and balance
- Wrong stabilizer leads to poor quality and uneven stitching
File Formats for Cap Embroidery
Depending on your machine brand, you'll need a compatible file format. Common hat embroidery formats:
|
Machine Brand |
Format |
|
Brother/Babylock |
PES |
|
Tajima |
DST |
|
Ricoma |
DST |
|
Janome |
JEF |
|
Bernina |
EXP |
|
Melco |
OFM/EXP |
Digitizing Buddy can deliver your hat design in all formats, so you're ready to go regardless of your machine.
FAQs About Hat Digitizing
Can I use a flat embroidery design on hats?
Technically yes, but it wont stitch well. Cap designs need to be digitized specifically for curved surfaces.
Can you embroider on the sides or back of caps?
Yes! Just use different hooping methods or side hoops. But the design must still be digitized appropriately for placement and size.
How much does professional hat digitizing cost?
Usually $15$30, depending on design complexity. Its worth it to avoid ruined hats or broken needles.
What thread should I use?
Use strong, hat-safe thread like polyester (e.g., Madeira or Isacord). Avoid rayon for structured hatsit breaks more easily.
Final Thoughts: Digitizing Is the Key to Perfect Hat Embroidery
Embroidery on caps can look amazingbut only if your design is properly digitized for hat structure, curve, and fabric type. Whether its a flat-brim snapback or a soft unstructured dad cap, the difference between a clean design and a disaster is all in the file.